Use the screenshots below to walkthrough uploading one or multiple files to our client FTP page. If you have further questions, or need access to upload – get in touch with account representative or contact the team at ArborOakland.
Client FTP Upload Guide
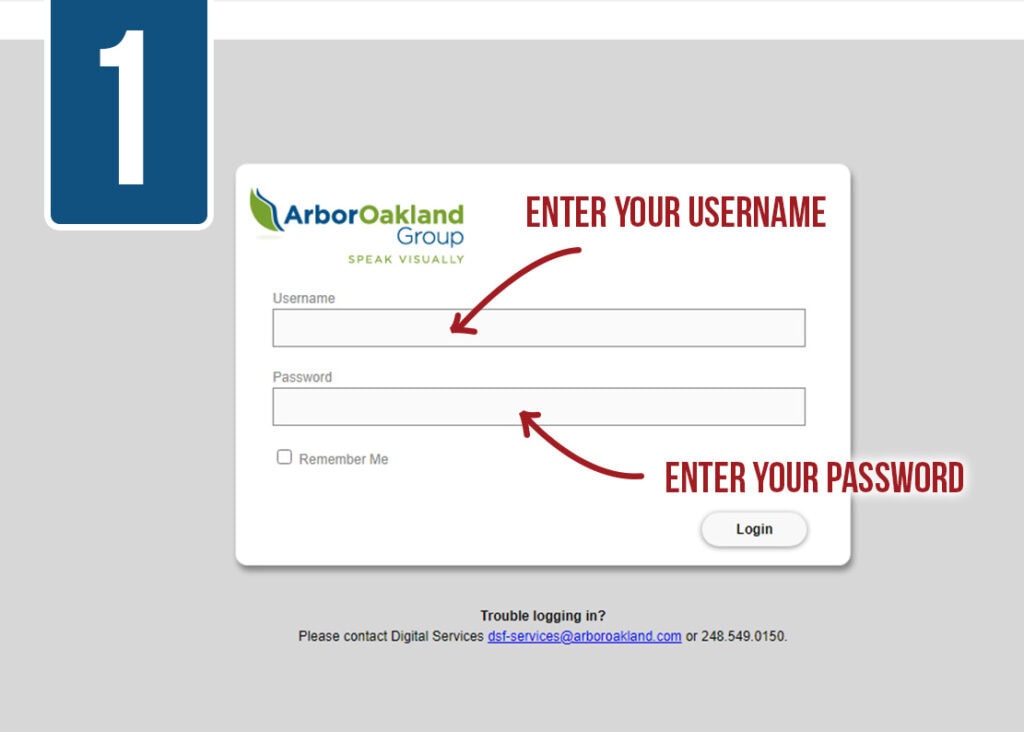
To begin, on the Client FTP enter your username and password (provided by your account representative) and login.
If you need a password, contact your account representative or the customer service team and they will be happy to assist you.

Once logged in, click the add files button to proceed. Using your file browser, navigate to and select your file(s) to upload.
We highly recommend zipped files – especially for packaged InDesign files, which helpfully includes fonts, image files and everything we may need.
Contact customer service with any questions you may have about files- how to make a packaged InDesign file, what to include, and anything else that you may need help with.
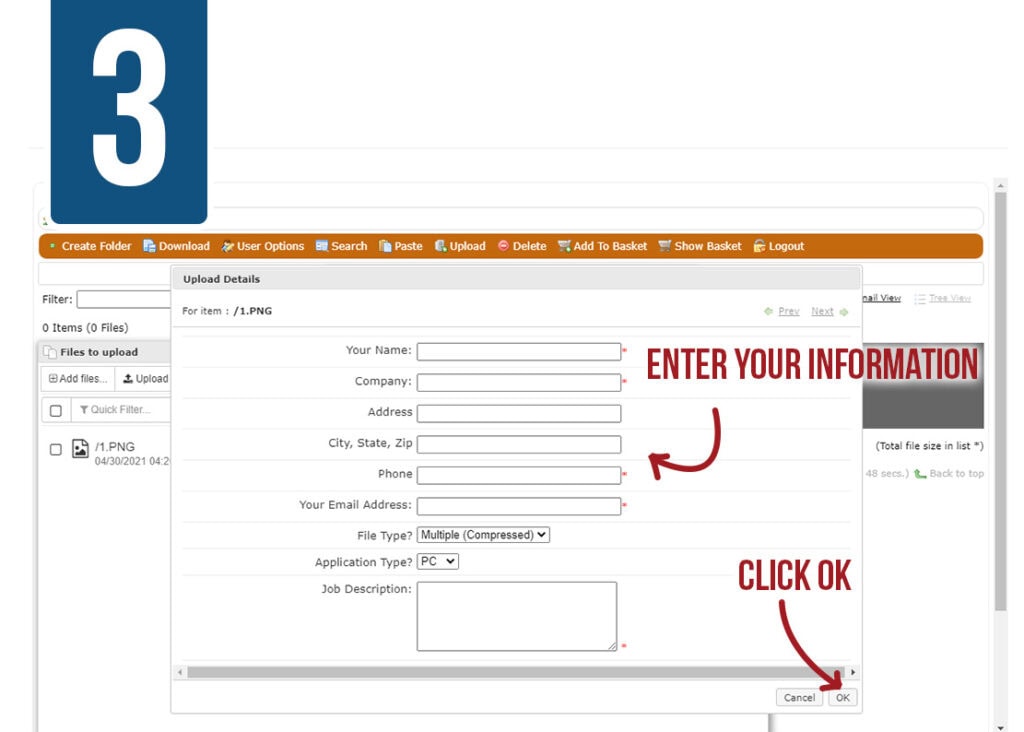
After you’ve selected your file(s), a form will prompt you for additional information. Provide as much info as you can, as this will assist us should we have any questions about the files.
Note: The provided email address will be the email that receives a confirmation once the upload is complete.

After you click OK on the details page, you will be able to review the contents of the upload. After confirming that your files are accurate, click “Start Uploading.”
You’ll see a green check mark to confirm that the process is complete and you will receive a confirmation email – which coincides with an automatic notification to ArborOakland that your files have been uploaded.